Our New
Clinician Portal
Everything you need in one clean package.

|

|
A modernized and fully upgraded version of our practitioner portal has finally arrived! We took all of what you have been asking for and suggesting into the features and tools that you have access to today, Including a sleek new HUD design, more functionality to accomplish what you need all in one key location, and much much more.
Key Changes
See Order Status in Real Time
Every kit and test order shows its current status, with shipment tracking numbers for clinic stock and drop ship.
Pay at the Point of Order
Payment is collected in the portal, so no one on your team or your patient needs to be phoned for card details afterward.
Manage your Own Account
Update clinic and account details, review past orders, and reorder from history without submitting a request.
One Place for Kit and Test Information
Panel details and the documents you need sit alongside the ordering screens.
How to Get Started
We understand that a huge web portal change like this could lead to some discomfort and confusion, so wanted to help. Below you will find each major feature and function with step by step instructions on how to use them.
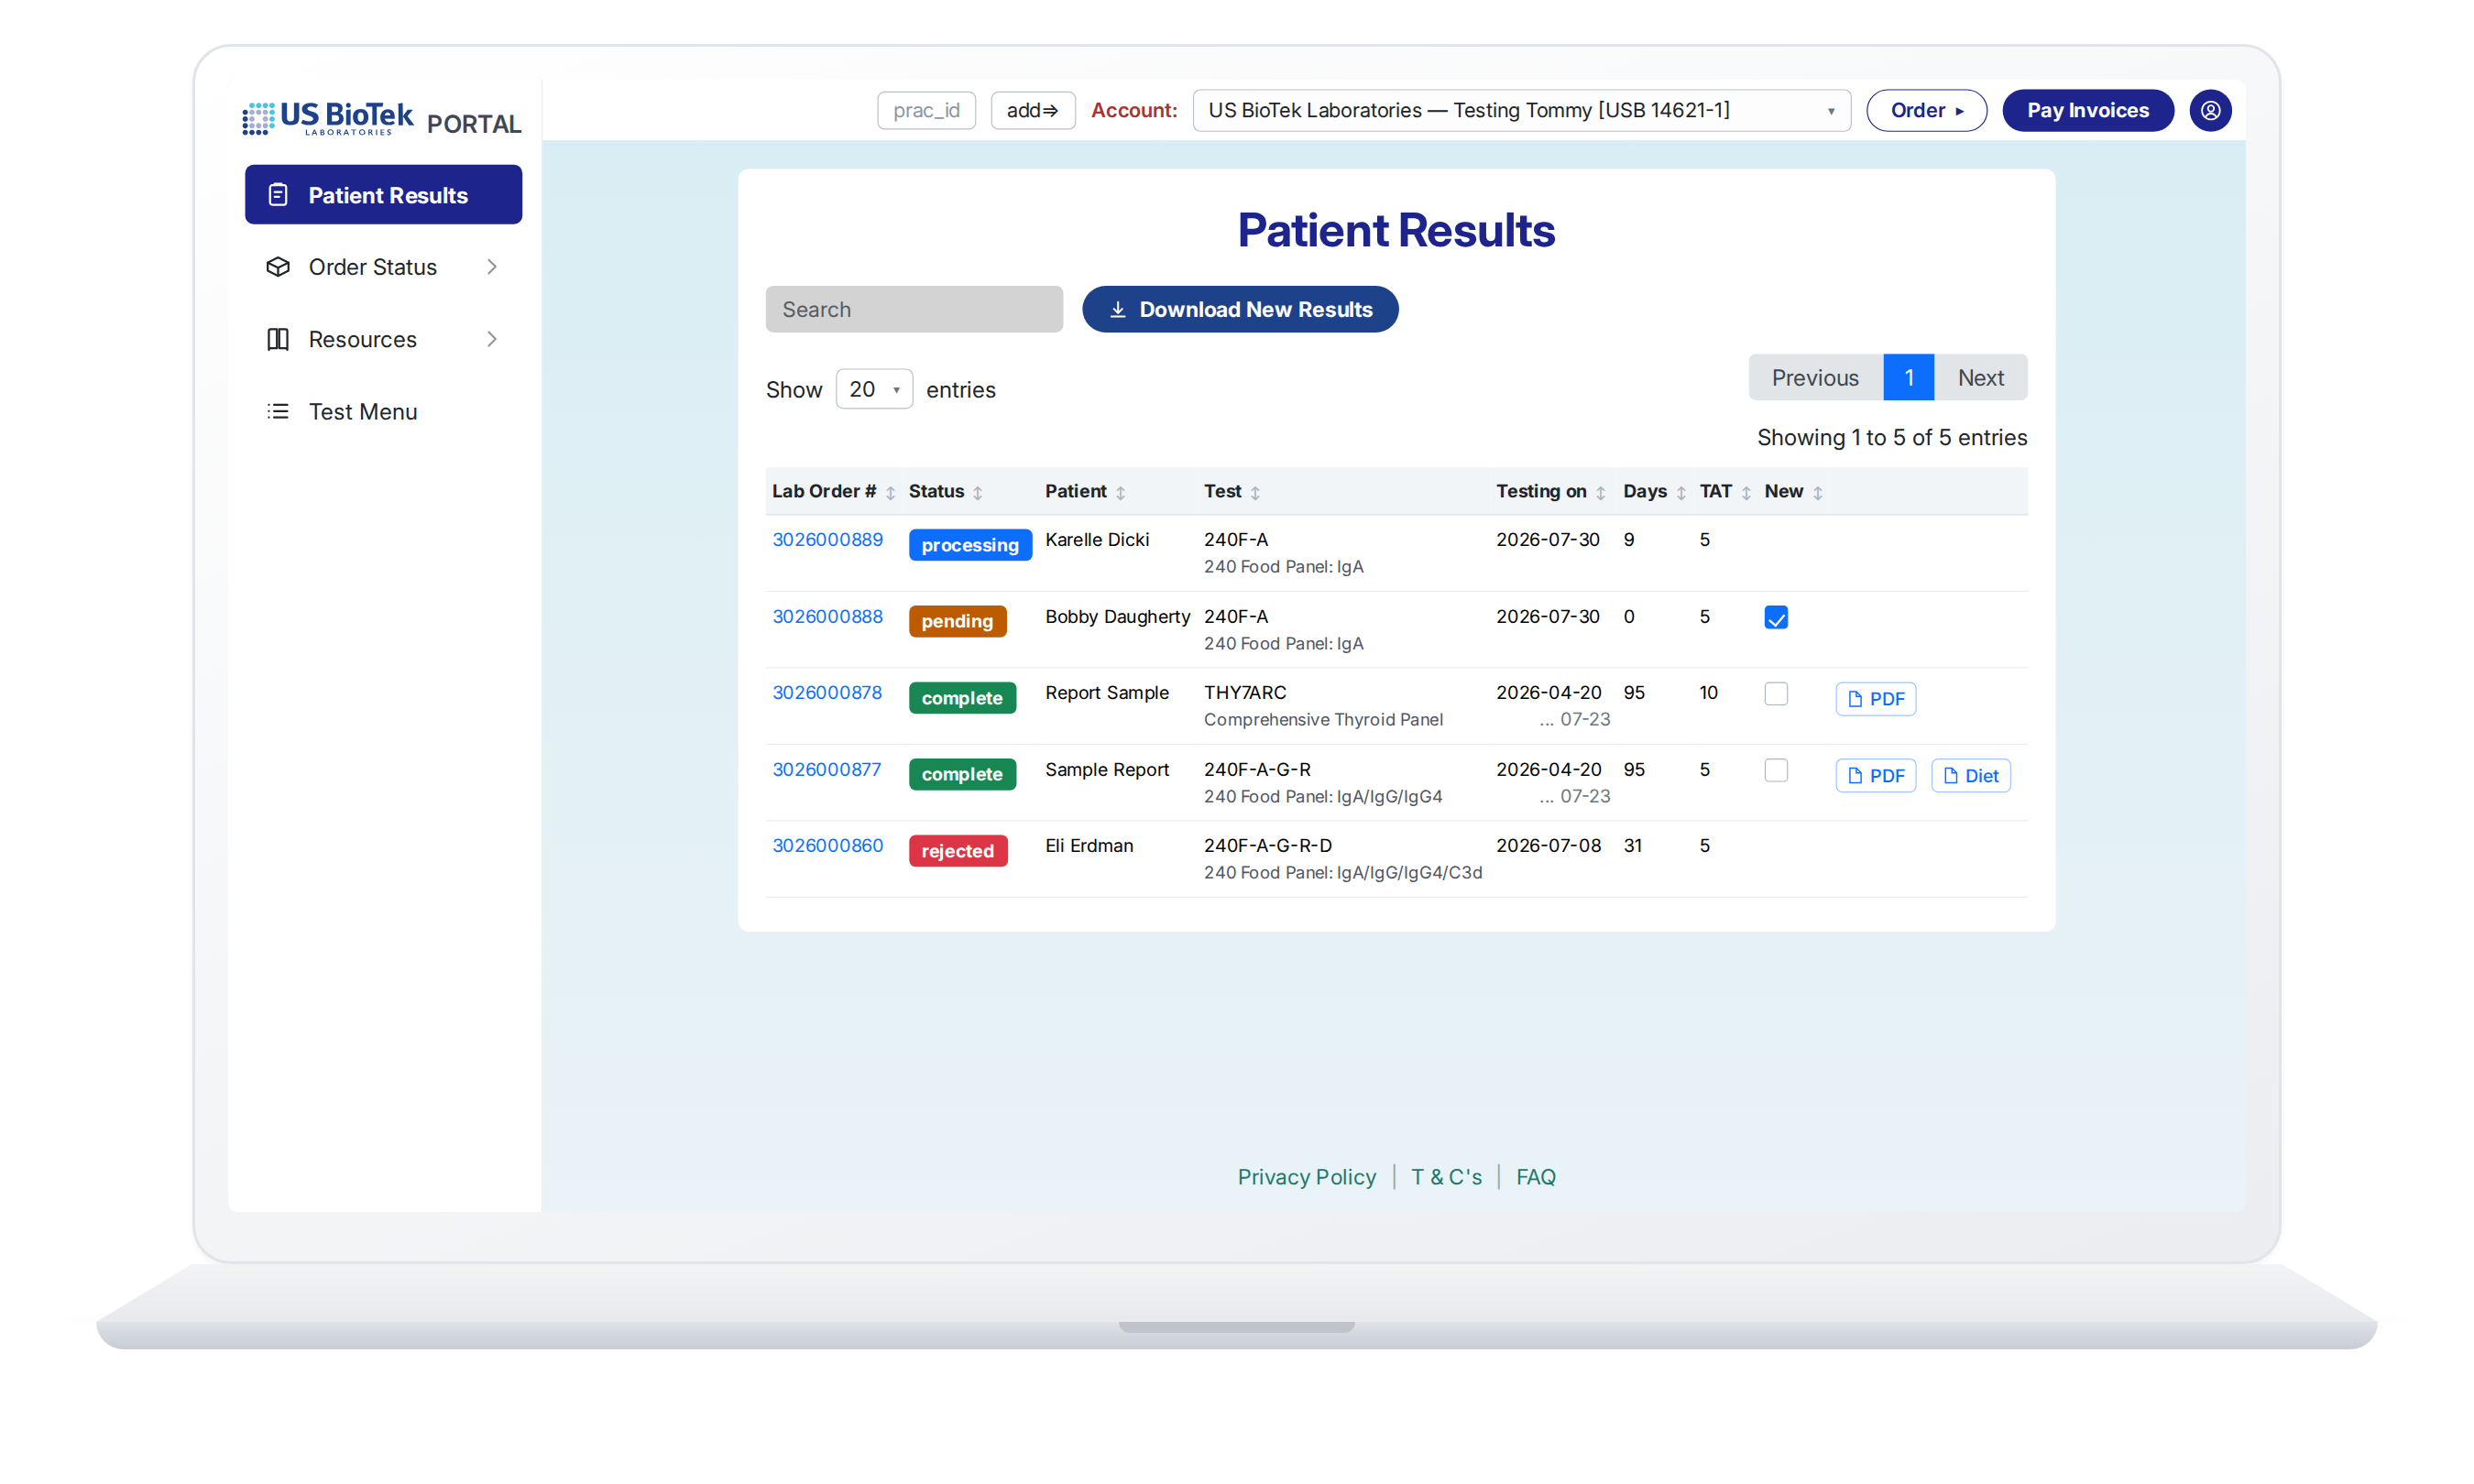
Patient Results
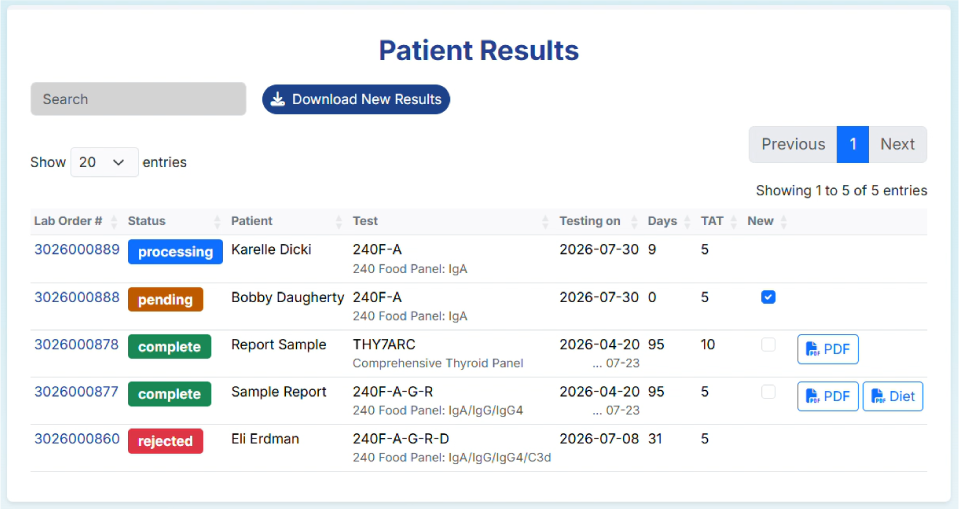
See a patient's test status the moment their sample reaches the lab, and pull every finished report yourself, no phone call needed. The New checkbox doubles as a shared clinic worklist, and Download New Results grabs every unread report in one click.
- Pick the practitioner at the top of the page to load their results.
- Use Search to filter by patient name, test code, or lab order #.
- Click PDF to open a report. Where a rotation diet report exists, a Diet button appears beside it.
- Click the New box on a row to mark its update as read. An unchecked box means there is an update nobody at the clinic has seen yet.
- Click Download New Results to bulk-download every report still marked unread, all at once.
Ordering Kits
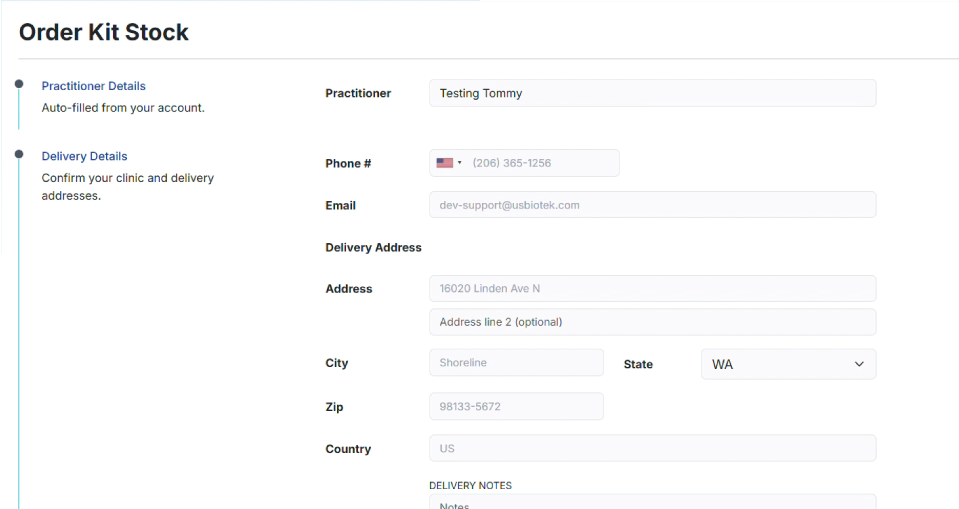
Order stock collection kits for your clinic yourself, no more calling it in. Your address is pre-filled and validated against Google Maps, and you can order up to 50 of each kit in a single order.
- Pick the practitioner the order belongs to.
- Confirm the delivery address, phone, and email. These carry through to the shipment and confirmation email, so fix them here rather than after you submit.
- Type in the kit search box, pick a kit from the list, and choose Add. It drops into Orders Summary below.
- Set the quantity on each row (up to 50). Use the red ✕ to remove a row you added by mistake.
- Add anything the shipping team should know under Delivery Notes (optional).
- Choose Submit. A confirmation email arrives and the order appears under Order Status / Ordered Kits.
Shipping a test to a patient
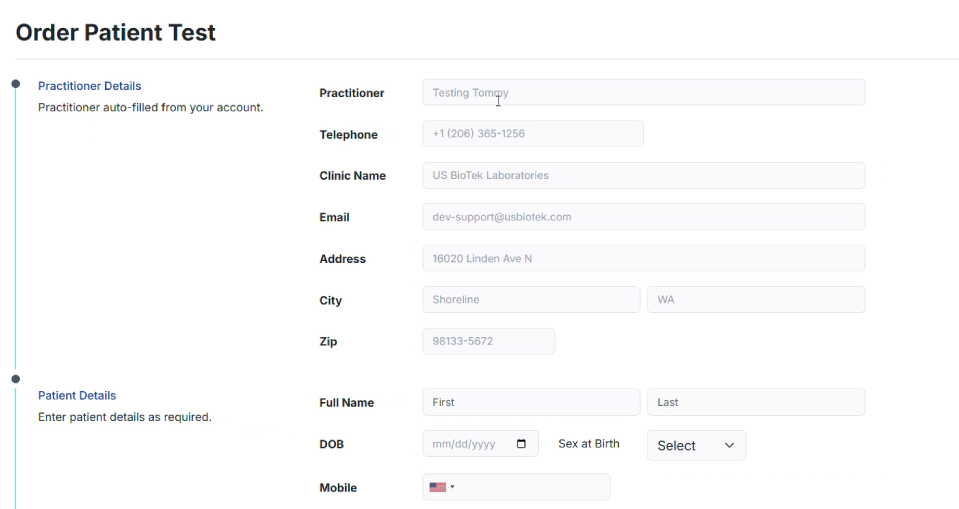
Send a test straight to a patient's door. The patient pays online and the kit ships with a digital barcode instead of a paper requisition, so there is no separate drop-ship fee, you simply pay for the test.
- Confirm the practitioner in the dropdown if you cover more than one account.
- Enter the patient's name, date of birth, sex, contact details, and shipping address. The name must match what gets written on the collection card, so take care here.
- Choose who is paying. Pricing changes between patient-pay and practitioner-pay.
- Search the test, choose Add, and pick the kit type if you are prompted.
- Repeat for any other tests going in the same shipment.
- Choose Submit. The patient is emailed a payment link and kit-use instructions.
Paying Invoices
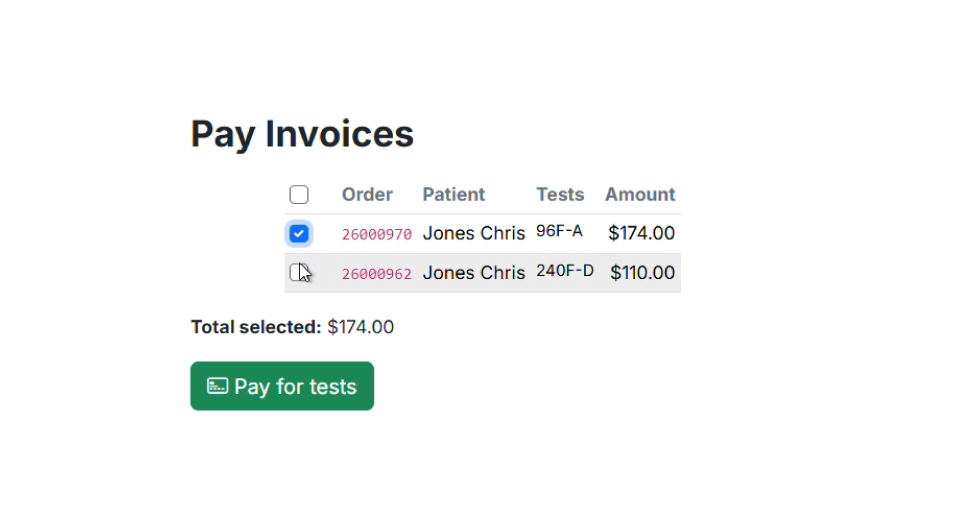
Settle outstanding drop-ship test invoices online, right from the portal. Payment runs through Shopify's secure checkout, so card details are never entered in the portal itself.
- Review the unpaid orders table. Each line shows the patient, the tests ordered, and the amount due.
- Tick invoices individually, or use Select All. The running total updates live so you can confirm the figure first.
- Choose Pay for tests to move to Shopify checkout.
- Enter payment and billing details on the secure checkout page and choose Pay now.
- You land on a receipt page listing the orders you just paid. Keep it for your records.
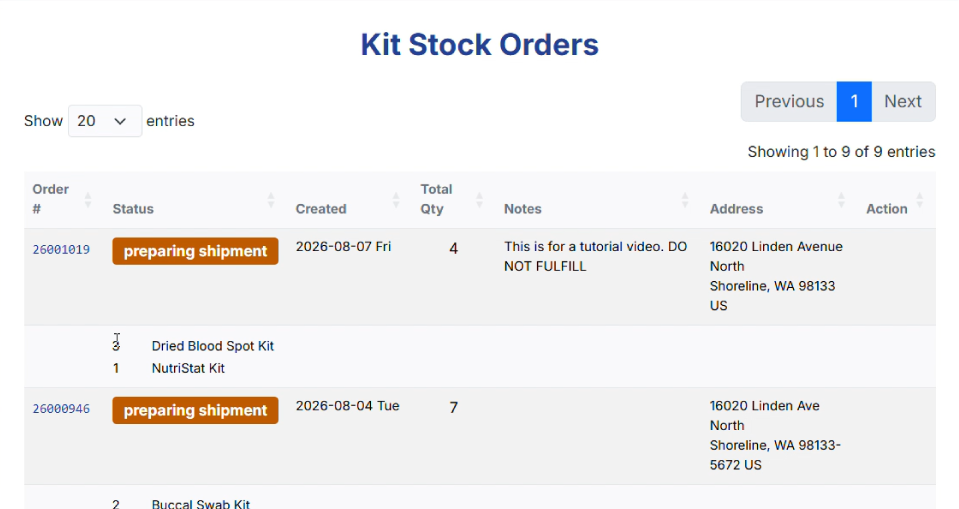
Order status: Ordered Kits
Track every clinic kit order in one place and see exactly where it is, from preparing shipment to shipped. When a kit order ships, parcel tracking is built right into the table.
- Pick the practitioner to load their orders.
- Read across the table: order #, status, date created, total quantity, notes, and delivery address.
- Open the rows beneath each order to see the individual kits and quantities that were ordered.
- Where an order has shipped, use the tracking button in the Action column to follow the parcel.
Kit orders cannot be edited in the portal. Contact us before an order ships if something needs to change; once it ships or is cancelled, it locks.
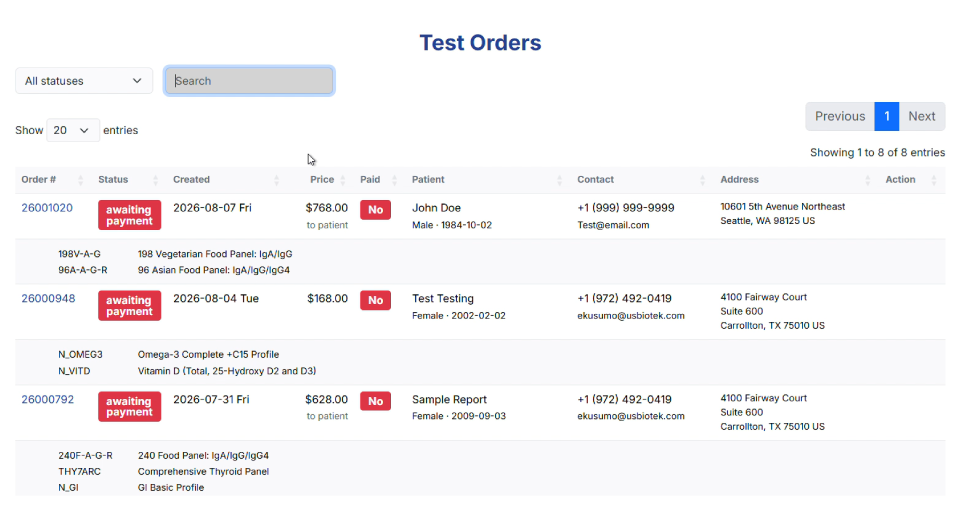
Order status: Ordered Tests
The biggest upgrade to the portal: follow every patient test order end to end. See whether it has been paid, watch it move from awaiting payment to shipped, and click straight through to live carrier tracking.
- Pick the practitioner to load their orders.
- Narrow the list with the status filter, or use Search to look up a patient name or order #.
- Check the Paid column to see whether an invoice is still outstanding.
- Open the rows beneath each order to see the test codes and descriptions on that order.
- Once an order has shipped, use the tracking button to jump to the carrier's tracking page.
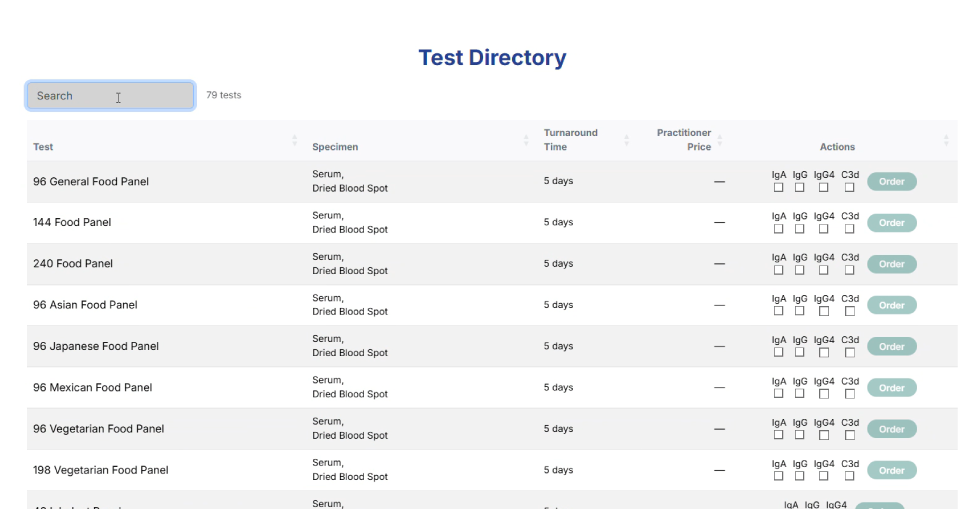
Test Directory
Browse the full testing menu, which mirrors your requisition form, and compare specimen type, turnaround, and your practitioner price side by side. Start an order straight from any row without leaving the page.
- Type into the Search box. Filtering begins at two characters, and every word must match, so "food serum" narrows harder than "food".
- Read across the row for description, specimen, turnaround time in days, and your practitioner price. A dash means no price is set for your account.
- Choose Order. A new tab opens the order form with the test already filled in, ready for the patient and shipping details.
- For food sensitivity panels, tick the IgA, IgG, IgG4, or C3d checkboxes instead. Order lights up once one is selected, and the price shown is per antibody.
Frequently Asked Questions
You enter the patient and test details, and the kit ships from the lab directly to the patient address. You can track the shipment in the portal.
The information you enter at order time becomes the requisition. Now the form that the patient has to take care of is much smaller and easier to follow.
Yes! When there are multiple emails attached to one practitioner ID, they all go to the same account and use the same password.
When creating your new password if you have multiple accounts, keep this in mind.
On the order record. Clinic stock and drop ship orders both show shipment tracking.
Dont have an account?
No worries! Creating a practitioner account is free, and only takes a few minutes.